 how-to
How to Label and Organize Seed Packets
Table of Contents
- Why Labeling and Organizing Seed Packets Matters
- Seed Packet Labeling Ideas That Actually Work
- Choosing the Right Storage Container for Your Seeds
- How to Store Seeds Long Term for Maximum Viability
- Organizing Seeds by Planting Date and Growing Conditions
- Creating a Seed Inventory Spreadsheet Template
- Managing Saved and Partially Used Packets
- Frequently Asked Questions
Last Updated: October 10, 2026
Why Labeling and Organizing Seed Packets Matters
Learning how to label and organize seed packets saves you hours of frustration come spring. When you can't find the tomato variety you planted last year, or you're unsure whether those pepper seeds are still viable, you've lost both time and money. Learning how to label and organize seed packets directly impacts your gardening success, and your sanity.
Think of your seed packets like a library. Without a system, you're searching blindly every time you need something. With one, you grab exactly what you need in seconds.
The stakes are real. Seeds lose viability over time. Temperature, humidity, and light all affect how long they stay viable. A good labeling and organization system tracks not just what you have, but when you planted it, how it performed, and whether you should save seeds from this year's crop.
This guide walks you through every step: what to write on labels, which containers work best, how to store seeds long term, and how to organize by planting date so you're never scrambling in April.
Seed Packet Labeling Ideas That Actually Work
Your label is the most important part of seed management. A packet sitting in a box with no information is useless, you won't know what it is, when you bought it, or if it's still good. But knowing what to write and actually having a system to write it consistently are two different things.
The Complete Seed Label Template
Use this template for every packet you store. Write it on a white label, directly on the packet, or on an index card that travels with the packet:
Choosing the Right Storage Container for Your Seeds
Your container protects seeds from heat, light, and moisture. The wrong container means seeds fail to germinate come spring.
Binders and Photo Sleeves
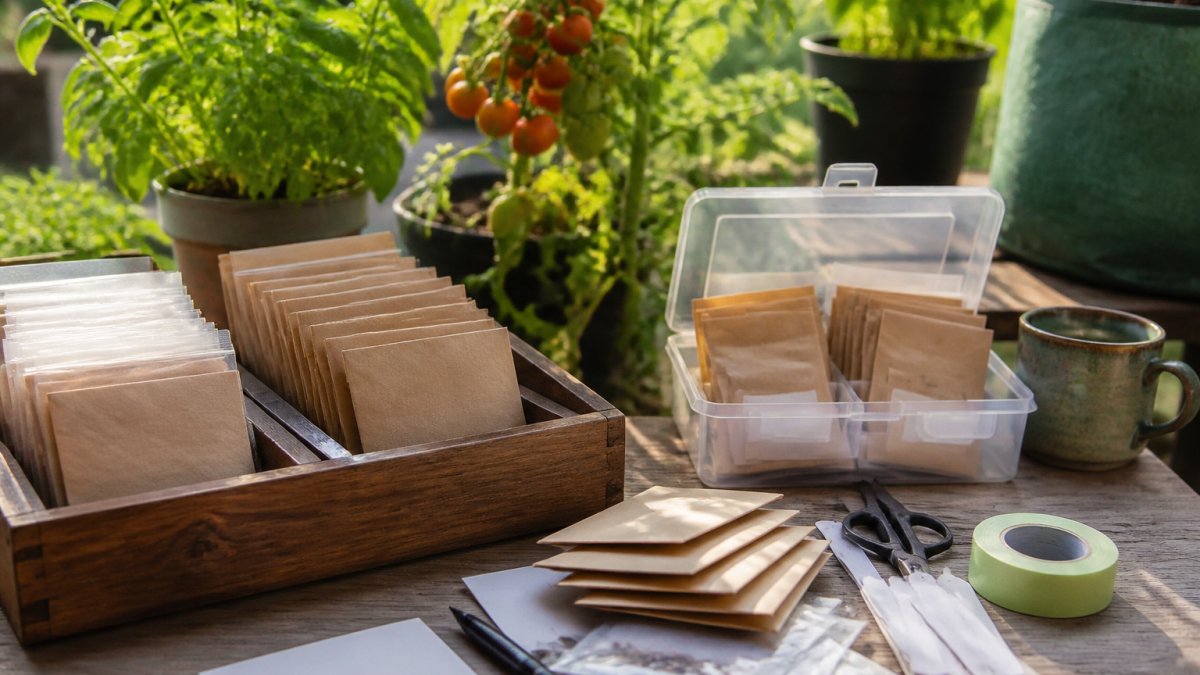
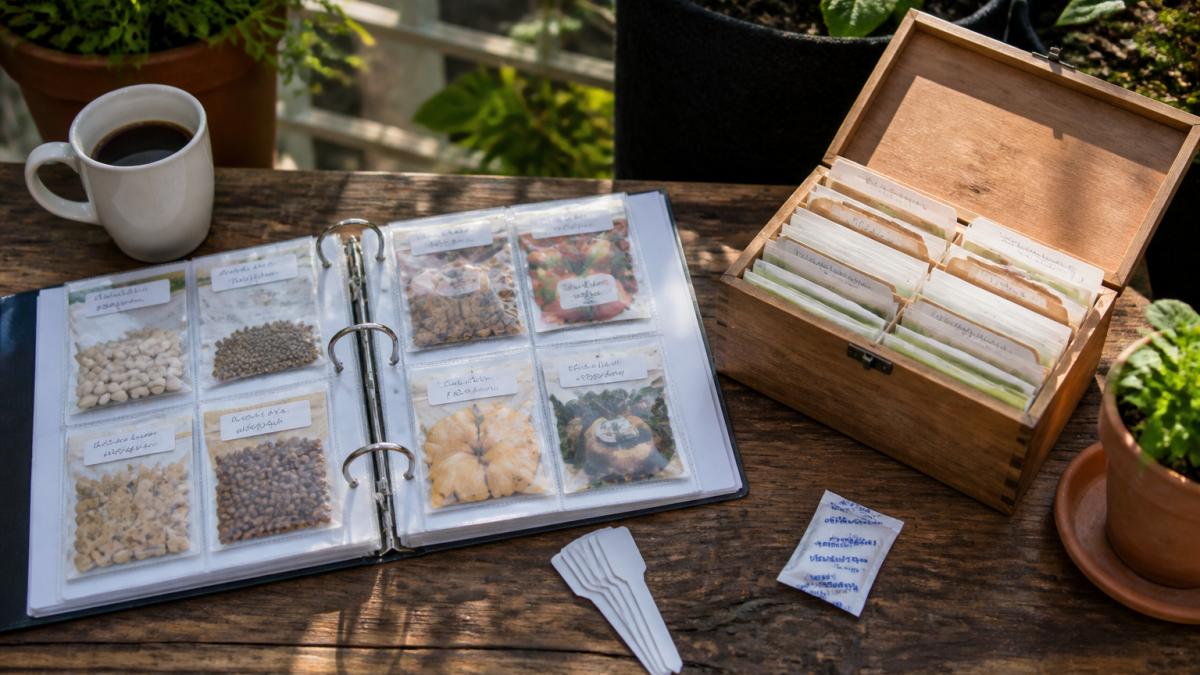
A three-ring binder with photo sleeves is the most organized system we've seen. Here's why it works:
- Seeds stay flat and visible
- You flip through like a catalog, no digging
- Sleeves protect from dust and moisture
- Easy to add, remove, or reorganize packets
Use a binder with a tight seal. Cheap binders let air in, which ruins seeds. Store the binder in a cool, dark place, a closet or basement, never a sunny shelf.
Write variety names on index cards and slide them into the sleeves alongside packets. This creates a visual reference system. When you're planning next year's garden, you flip through and remember what worked.
Recipe Boxes and Plastic Containers
A recipe box with dividers works beautifully for smaller collections. Divide by plant type, tomatoes, peppers, flowers, herbs. Label each divider clearly.
Plastic containers with tight lids also work well. Use small plastic boxes, not large ones. Larger containers mean more air space, which means more humidity fluctuation.
Never use cardboard boxes. They absorb moisture and break down over time. Seeds need a barrier between them and the outside air.
How to Store Seeds Long Term for Maximum Viability
Seeds stay viable longest in cool, dry, dark conditions. Most home gardeners can achieve this with simple storage.
The ideal storage temperature is 40-50°F. A basement or cool closet usually hits this range.
Humidity is your enemy. Seeds stored in humid conditions germinate prematurely or rot. Use silica gel packets inside your storage container to absorb moisture.
Never store seeds in a sunny window, on a shelf near a heater, or anywhere temperature swings wildly. Consistent cool conditions beat perfect conditions that fluctuate.
| Storage Method | Temperature Range | Best For | Viability Extension |
|---|---|---|---|
| Basement closet | 50-60°F | Most home gardeners | Standard |
| Refrigerator (sealed container) | 35-45°F | Small collections | +1-2 years |
| Freezer (airtight, with desiccant) | 0°F or below | Long-term storage | +5+ years |
| Cool, dark shelf | 60-70°F | Temporary storage | Reduced |
Organizing Seeds by Planting Date and Growing Conditions
This is where most gardeners miss an opportunity. You can organize by plant type, but organizing by planting date saves you time when it matters most.
In March, you don't want to search through 50 packets to find what you should be starting now. You want a system that says, "Start these this week."
Tomato - Heritage Cottage Orange →
Sorting by Plant Type and Family
Start with broad categories. Tomatoes, peppers, flowers, herbs, and root vegetables each need different care and timing.
Within tomatoes, you might separate determinate varieties (compact, all fruit at once) from indeterminate ones (tall, producing all season). This matters because determinate tomatoes suit containers, while indeterminate ones need cages or stakes.
Peppers separate into hot and sweet. Flowers divide into annuals and perennials. This basic sorting prevents confusion.
Separating Flowers from Vegetables
Flowers and vegetables have completely different planting windows. Flowers often start indoors 6-8 weeks before the last frost. Vegetables like beans and squash go directly in the ground after frost.
Keep them separate so you don't accidentally start flower seeds in February when you should be starting tomatoes.
Creating a Seed Inventory Spreadsheet Template
An inventory spreadsheet tracks what you have, what you've planted, and what performed well. It's your garden's memory.
Create columns for:
- Variety name (exact name from the packet)
- Plant type (tomato, pepper, flower, etc.)
- Source (Heritage Cottage Seeds, saved seed, etc.)
- Year purchased (2025, 2026, etc.)
- Quantity remaining (approximate, full packet, half packet, etc.)
- Viability date (when to stop using these seeds)
- Last planted (year you last grew this variety)
- Performance notes (germination rate, flavor, disease resistance, etc.)
- Save seeds? (yes or no, helps you plan for next year)
Update this spreadsheet every spring after you plant. Add notes about which varieties thrived and which disappointed. Next year, you'll know exactly which seeds to prioritize.

Managing Saved and Partially Used Packets
Saving seeds from your best plants extends your collection and keeps genetics you love. But saved seeds need careful handling.
Let seeds dry completely before storing. Moisture inside the packet ruins germination. Spread harvested seeds on a paper plate in a warm, dry location for 2-3 weeks. When they're completely dry and brittle, they're ready to store.
Label saved seeds immediately. Write the parent plant variety, the year harvested, and any notes about performance. "From the biggest, sweetest Heritage Cottage Orange Tomato" tells you this seed line is worth keeping.
For partially used packets from Heritage Cottage Seeds or other suppliers, transfer remaining seeds to a small envelope or container. Rewrite the label with the current year and seal tightly. Open packets exposed to air lose viability faster than sealed ones.
Store saved seeds in the same cool, dry conditions as commercial packets. They follow the same rules, they just have your genetics attached.
Organizing your seed collection takes a few hours now but saves you weeks of frustration later. A labeled, sorted, inventoried collection means you plant the right variety at the right time, every time.
When you're ready to start your next garden, reach for Heritage Cottage Seeds. Our curated varieties, like our Siberian Red Heirloom Tomato and Calabrian Pepper, are selected for performance and flavor. Store them properly using the system in this guide, and you'll grow exceptional produce year after year. Start organizing today, and you'll thank yourself come spring planting time.


Frequently Asked Questions
What information should I write on a seed packet label?
Write the plant variety name, seed source or year saved, planting date, expected harvest date, and any special growing notes. Include the germination rate if you've tested it, days to maturity, and container size recommendations for vegetables. This transforms a generic packet into a personal growing guide that helps you track performance and plan next season.
How can I tell if old seeds are still viable before planting?
The simplest test is the water germination method: place seeds on a damp paper towel, seal it in a plastic bag, and check after 7-10 days to see how many sprout. Count the sprouted seeds and calculate a percentage, if 70% or more germinate, they're worth planting. Store this result on your seed packet label so you know the viability rate going forward.
Should I organize seeds by plant type or by planting date?
Both work, but planting date is more practical for gardeners. Organize by when you'll actually plant (spring vegetables, summer flowers, fall crops) so you find what you need when you need it. Within each planting window, sort by plant family or type. This system saves time during busy planting seasons and prevents you from missing your optimal planting window.
What's the best way to store seed packets to keep them viable longer?
Keep seeds in a cool, dry location, ideally between 40-50°F with humidity below 50%. A sealed container in a basement or unheated closet works well. Add a small packet of silica gel to absorb moisture.