 how-to
How to Store Heirloom Seeds Properly
Table of Contents
- Why Proper Storage Matters for Heirloom Seeds
- Step 1: Harvest and Clean Your Seeds
- Step 2: Dry Seeds Before Storage
- Choosing Seed Storage Containers
- Creating Cool, Dry Storage Conditions
- How to Store Seeds Long Term
- How Long Do Vegetable Seeds Last
- How to Test Seed Germination
- Frequently Asked Questions
Last Updated: October 17, 2026
Why Proper Storage Matters for Heirloom Seeds
Learning how to store heirloom seeds properly is the difference between a thriving garden and a disappointing one. At Heritage Cottage Seeds, we've learned that the work doesn't end when you harvest or buy your seeds. How you store them determines whether they'll sprout next season or sit in a drawer going nowhere.
Heirloom seeds are living things. They need specific conditions to stay viable and ready to grow. Get storage right, and your seeds stay potent for years. Get it wrong, and you're throwing money away.
The goal is simple: keep seeds cool, dry, and dark. That's it. But the details matter more than you'd think, especially if you're saving seeds from your own garden or investing in rare varieties.
Step 1: Harvest and Clean Your Seeds
Before you even think about storage, your seeds need to be fully mature and completely dry. Timing matters here.
When to harvest:
- Wait until seed pods or fruits are fully ripe on the plant
- For tomatoes and peppers, let them sit on the vine until they're fully colored
- For beans and peas, wait until the pods turn brown and papery
- If you're harvesting from the garden late in the season, pick before frost hits
Cleaning your seeds: Once harvested, seeds need cleaning to remove fruit pulp, debris, or chaff. This step prevents mold and keeps your storage containers clean.
- For wet seeds (tomatoes, peppers, squash), ferment them first. Place seeds in a jar with a little water and let them sit for 2-3 days. This breaks down the gel coating.
- Rinse thoroughly under running water and spread on a clean cloth to dry.
- For dry seeds (beans, peas, lettuce), simply remove the pod and let any loose debris fall away.
- Use a fine mesh screen to separate seeds from chaff if needed.
Mississippi State University Extension guidance on seed saving
Clean, dry seeds are your foundation. Skip this step and you're inviting trouble down the road.
Step 2: Dry Seeds Before Storage
This is where most gardeners either succeed or fail. Moisture is the enemy of seed storage. Seeds that aren't completely dry will rot, mold, or lose viability in storage. The goal is to get seed moisture down to a safe level, roughly 8-10% for most vegetables, before you seal anything up.
Air-Drying Method
The simplest approach is to let time and air do the work. Spread your seeds in a single layer on paper towels, newspaper, or a fine mesh screen in a warm, dry spot.
- Place them in a room with good air circulation and low humidity
- Keep them out of direct sunlight (light can damage seeds)
- Leave them for 2-4 weeks, depending on seed size and humidity levels
- Stir occasionally so all sides dry evenly
- They're ready when they snap or crack easily between your fingers, not bend
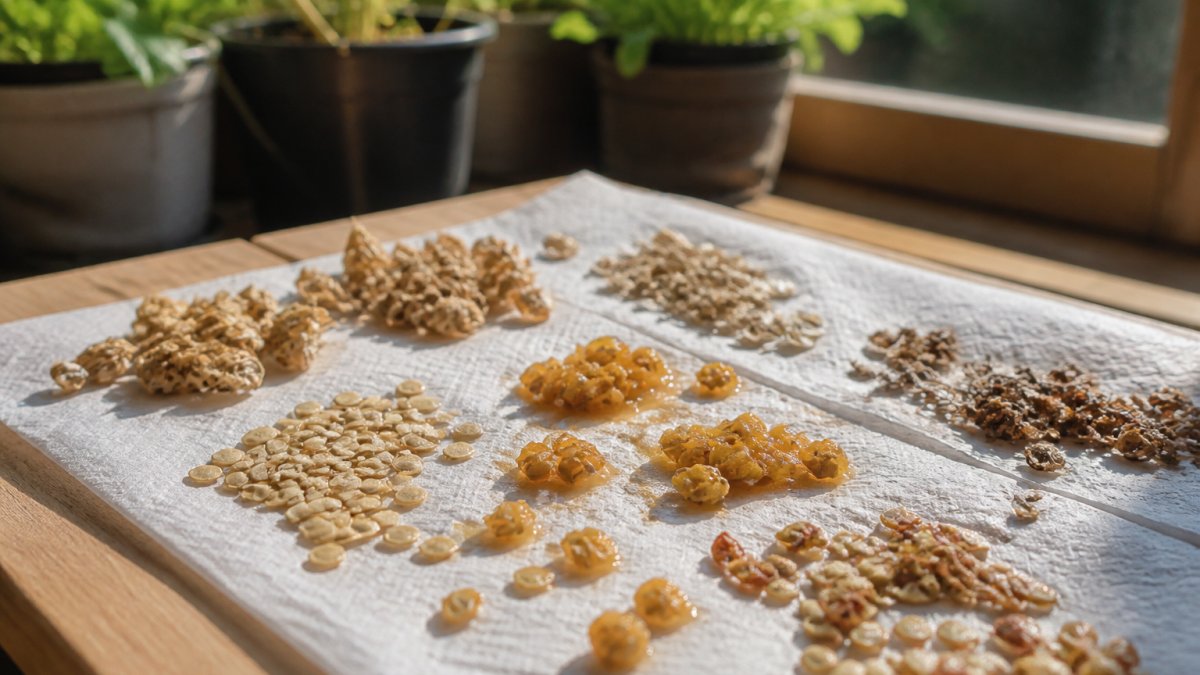
Some gardeners use a dehydrator on the lowest setting (95-105°F), but air drying is gentler and just as effective if you have the time. Avoid oven drying, temperatures are too high and can kill the embryo.
Checking Moisture Levels
You need to know when seeds are actually dry. Guessing leads to stored seeds that rot or lose germination power. Here's a repeatable method:
- The snap test: Take a seed and try to bend it between your fingers. If it snaps cleanly, it's dry enough. If it bends, it needs more time. This works well for large seeds like beans and peas.
- The silica gel indicator: Place seeds and a small packet of silica gel (the kind that comes in supplement bottles or electronics packaging) in a sealed jar for 3-4 days. If the gel stays blue or clear, your seeds are dry. If it turns pink, they still have moisture, return them to the drying screen for another week.
- The salt test (for small seeds): Put a tablespoon of dry salt in a small jar with a few seeds. Shake and let sit for an hour. If the salt clumps, seeds are still too moist.
Signs Seeds Are Ready for Storage
- Seeds snap or crack when bent
- Seed coats are dull, not shiny
- No moisture beads form inside a sealed jar after 24 hours
- Silica gel stays blue after 3-4 days
If you notice mold, musty smell, or seeds that are still soft after 4 weeks, discard them, they won't store well. Store your dried seeds in a cool place until you're ready to pack them for long-term storage.
Choosing Seed Storage Containers
The right container keeps moisture and light out. Wrong container, and you're wasting your effort.
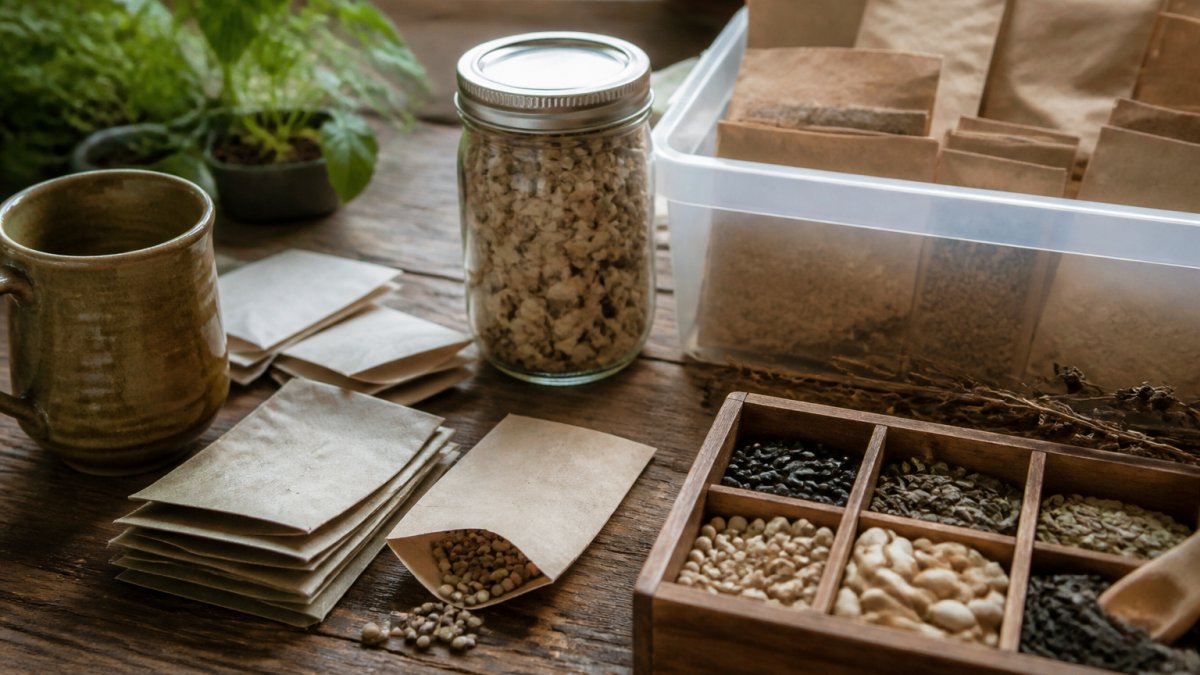
Glass jars are the gold standard. Mason jars, old jam jars, or any glass container with a tight-fitting lid works beautifully.
Paper envelopes work for short-term storage (1-2 years) in cool, dry conditions. They're breathable, which is good for preventing moisture buildup, but they don't protect against light or pests.
Plastic bags are convenient but not ideal for long-term storage. Plastic can absorb and release moisture over time.
Airtight containers are essential for anything longer than a season. Plastic storage bins with snap lids work in a pinch, but glass jars are better.
Before you fill any container, make sure it's completely dry inside. Even a tiny bit of moisture will cause problems.
Creating Cool, Dry Storage Conditions
Temperature and humidity are the two factors that determine how long your seeds stay viable. Get both right, and your seeds will outlive you.
The ideal storage environment:
- Temperature between 32-41°F (refrigerator range)
- Humidity below 50% (aim for 30-40% if possible)
- Complete darkness (no light exposure)
- Stable conditions (no fluctuations)
A cool closet, basement, or pantry works if your home stays cool year-round. In warmer climates, a refrigerator is your best bet.
Avoid attics (too hot), basements with moisture issues (too damp), or windowsills (too much light and temperature swings).
Tomato - Heritage Cottage Orange →
Label everything. Write the seed variety, harvest date, and storage date on your container. You'll thank yourself next spring when you're pulling seeds from a drawer and actually know what you're grabbing.
How to Store Seeds Long Term
If you're serious about seed saving or want to store heirloom seeds and preserve rare varieties like our Heritage Cottage Orange Tomato, you'll need strategies for keeping seeds viable for years.

Refrigerator Storage
A standard refrigerator is perfect for storing seeds. The temperature is stable, it's dark, and humidity is controlled.
How to refrigerate seeds:
- Place dried seeds in an airtight glass jar or sealed plastic bag
- Add a small packet of silica gel to absorb any stray moisture
- Label clearly with variety and date
- Store on a shelf (not the door, where temperature fluctuates)
- Keep seeds in the back, away from the cooling vent
Seeds stored this way stay viable for 3-5 years, sometimes longer. Check them every 6 months or so. If you notice any moisture inside the container, remove seeds immediately and dry them again.
Freezer Storage
For heirloom varieties you really want to preserve, the freezer is your ultimate backup. Seeds can last 10+ years in a freezer, sometimes much longer.
Freezer storage steps:
- Make sure seeds are completely dry (use silica gel for 3-4 days before freezing)
- Place in an airtight glass jar with a silica gel packet
- Wrap the jar in a plastic bag for extra protection
- Label with variety, harvest date, and freezing date
- Store in the back of the freezer where temperature stays most stable
The key rule: don't open the container until you're ready to plant. When you take seeds from the freezer to the garden, let them warm to room temperature while still sealed. This prevents condensation from forming on the seeds.
How Long Do Vegetable Seeds Last
Seed longevity varies by crop. Some seeds stay viable for just a year or two. Others last a decade or more if stored properly.
| Vegetable | Storage Life | Best Storage Method | Notes for Container Growers |
|---|---|---|---|
| Tomato | 4-6 years | Refrigerator or freezer | Ferment before drying; store airtight. Great for containers. |
| Pepper | 2-4 years | Refrigerator | Dry thoroughly; sensitive to moisture. |
| Squash | 4-8 years | Cool, dry closet | Large seeds; ensure complete drying. |
| Bean | 3-4 years | Cool, dry closet | Watch for bean weevils; freeze to kill eggs. |
| Lettuce | 3-5 years | Refrigerator | Small seeds; use silica gel. |
| Carrot | 3-4 years | Cool, dry closet | Poor viability if stored warm. |
| Cucumber | 5-10 years | Freezer | Very durable; freeze for long-term. |
| Pea | 2-3 years | Cool, dry closet | Similar to beans; avoid humidity. |
| Okra | 2-3 years | Cool, dry closet | Southern staple; dry pods thoroughly. |
| Southern Pea (Cowpea) | 3-5 years | Cool, dry closet | Excellent for containers; drought-tolerant. |
These are estimates under ideal conditions. Your results depend on how well you dried the seeds, how stable your storage temperature is, and how much light they're exposed to. For container gardeners, starting with fresh, properly stored seed is key, containers dry out fast, and weak seed won't tolerate stress.
Mississippi State University Extension guidance on seed saving
Keep records of when you stored each variety. This helps you use older seeds first and know when to replace them. A simple notebook or spreadsheet with variety, harvest year, and source will do.
How to Test Seed Germination
Before you plant a whole row of seeds you've been storing for years, test a small sample first. This tells you if they're still viable.
Simple germination test:
- Place 10 seeds on a damp paper towel
- Roll it up loosely and place it in a plastic bag
- Keep it warm (around 70°F) and moist for the number of days listed on the seed packet
- Count how many seeds sprout
If 8 out of 10 sprout, you have an 80% germination rate. That's still plenty for planting. If only 2 sprout, those seeds are getting old and should be replaced.
This test takes a week or two, so do it before your planting season starts. It saves you from wasting garden space on seeds that won't grow.
For heirloom varieties like our Siberian Red Heirloom Tomato or Cherokee Purple, a germination test is especially useful. These are rare varieties worth protecting, and knowing their viability before planting means you can plan accordingly.


University of Minnesota Extension seed testing guide
Frequently Asked Questions
What is the best way to store heirloom seeds to keep them viable?
Store heirloom seeds in airtight containers in a cool, dry place away from direct light. Keep them at a stable temperature between 32-50°F with humidity below 50%. Proper drying before storage is essential, seeds should snap cleanly when bent, not bend. Mississippi State University Extension recommends cool, dry storage as the foundation for maintaining seed viability and ensuring strong germination rates for your garden.
How long do vegetable seeds last in storage?
Most vegetable seeds remain viable for 2-5 years with proper storage, though some varieties last longer. Tomato and pepper seeds, which are popular heirloom varieties, typically maintain good germination rates for 3-4 years when kept in cool, dry conditions. Freezer storage can extend viability even further. Germination rates gradually decline over time, so testing old seeds before planting is wise.
Should I store seeds in the refrigerator or freezer?
Both work well for long-term heirloom seed storage. Refrigerator storage (around 40°F) is ideal for seeds you plan to use within a few years. Freezer storage (around 0°F) extends viability significantly, often 5-10 years or more. Always ensure seeds are completely dry before freezing, and store them in airtight, moisture-proof containers. Allow frozen seeds to warm to room temperature before opening to prevent condensation.
How do I know if my stored seeds will still germinate?
Perform a simple germination test before planting. Place 10 seeds on a damp paper towel, fold it, and keep it warm and moist for 7-10 days. Count how many sprout. If 8 out of 10 germinate, your germination rate is 80%, plant more densely to compensate for older seeds with lower rates. This helps you adjust your planting strategy and avoid wasting garden space on non-viable seeds.
Storing heirloom seeds properly isn't complicated, but it does require attention to detail. Keep them cool, dry, and dark, and they'll reward you with years of reliable growth. If you're growing heirloom varieties from Heritage Cottage Seeds, whether it's our Calabrian Pepper or one of our signature tomato varieties, proper storage means you'll get the most from every seed you plant.