 how-to
How to Transplant Seedlings Into Larger Pots: A Simple Guide
Last Updated: November 5, 2026
Quick Summary
To transplant seedlings, wait until they have their first set of true leaves, then move each one into a pot about 2 inches wider than its current home. Water the seedlings first, lift them gently by the leaves, and use fresh potting mix in a pot with drainage holes. Water thoroughly afterward and shade the plants for a few days.
- Move seedlings once they have a few true leaves, not just the rounded seed leaves.
- Choose a pot roughly 2 inches wider than the one the seedling is leaving.
- Water seedlings a few hours before moving so the roots slide out more easily.
- Lift seedlings by their leaves, never by the stem.
- Wait about a week to ten days before fertilizing to avoid burning new roots.
Table of Contents
- Knowing When Your Seedlings Are Ready to Move Up
- Choosing the Right Size Pot for Seedlings
- Gathering Your Transplanting Tools and Potting Mix
- Step-by-Step: How to Transplant Seedlings Into Larger Pots
- How to Prevent Transplant Shock in Seedlings
- Troubleshooting and Aftercare: Your Next Steps With Container Seedlings
- Frequently Asked Questions
Pulling a tiny seedling out of its tray and dropping it into a bigger pot can feel a little nerve-racking. Pull too hard and you snap the roots. Wait too long and the plant gets stuck. The good news is that transplanting seedlings into larger pots is a simple job once you know what to look for, and it is one of the most useful skills a container gardener can pick up. The steps below follow the practical guidance Mississippi State University Extension gives home gardeners in the Southeast (Subirrigated Containers for the Mississippi Gardener).
Knowing When Your Seedlings Are Ready to Move Up
The right time to pot up is usually when a seedling has its first set of true leaves. Those are the leaves that look like miniature versions of the mature plant, not the rounded seed leaves that came up first.
Waiting for true leaves gives the young plant enough strength to handle the move. Moving it too early can leave it fragile and slow to recover.
Signs your seedlings have outgrown their containers
Watch for these warning signs that your seedlings need more room:
- Roots poking out of the drainage holes at the bottom of the cell or tray
- Roots circling the inside of the cell in a tight, tangled mat
- Leaves starting to crowd or touch the neighboring seedlings
If you see two or three of these, it is time to move your seedlings up.
Choosing the Right Size Pot for Seedlings
A pot that is too big can hold extra water around the roots and invite rot. A pot that is too small will starve the plant.
The reason size matters so much in containers is that potting mix behaves differently from garden soil. For a full guide to growing herbs like basil in pots, including suitable sizes, you can read on.
Pot-size guidance by seedling type and growth stage
Use this as a starting point, then adjust for how fast your plants are growing:
- Young seedlings with a few true leaves: A 3 to 4 inch pot is usually enough. This is the classic first pot-up step for tomatoes, peppers, and most herbs started in flats.
- Fast-growing seedlings like basil: Move these up to a 4 to 6 inch pot before they get leggy. Basil grows quickly in warm weather and can outgrow a small cell in a couple of weeks.
- Tomatoes and peppers: Give them a 1 gallon container or larger once they are growing well, since these plants need deeper roots. For a full-season container tomato, plan on a 5 gallon pot or larger at the final step.
A simple rule of thumb many container gardeners use: choose a pot roughly 2 inches wider in diameter than the one the seedling is leaving. That gives the roots new mix to explore without drowning them in unused space.
Container material and drainage for container vegetables
Drainage holes are non-negotiable. Without them, water collects at the bottom and roots suffocate. Beyond that, the material matters in our climate:
- Plastic pots hold moisture longer, which is helpful in spring but can stay too wet during rainy spells. They are lightweight and easy to move.
- Fabric grow bags air-prune roots and dry out faster, which suits the humid Southeast but means you will water more often.
- Terracotta and unglazed clay wick moisture through the walls and dry out quickly, good for herbs that dislike wet feet, less forgiving for thirsty tomatoes in July.
Whatever you choose, fill each new pot with fresh potting mix, not garden soil, because garden soil packs down too tightly in containers and drains poorly. A mix that is lightweight and holds moisture without staying soggy is what you are after.
Here is a quick reference for the pot sizes the article recommends at each stage.
| Seedling type | Starting pot size | Later pot size |
|---|---|---|
| Young seedlings with a few true leaves | 3 to 4 inch pot | Usually enough for the first pot-up step |
| Basil | 4 to 6 inch pot | Before it gets leggy |
| Tomatoes and peppers | 1 gallon or larger | 5 gallon or larger for full-season tomato |
| Micro tomatoes like Tiny Tim | 1 to 2 gallon pot | Patio and balcony gardens |
| Leafy greens and herbs | 4 to 6 inch pot | One plant per pot, or several in a wider container |
Gathering Your Transplanting Tools and Potting Mix
You do not need much to do this job well. Gather these items before you start:
- Larger pots with drainage holes, clean and ready to use
- Fresh potting mix, moistened ahead of time
- A butter knife or plant label to help lift seedlings
Having everything ready keeps the roots out of the air for less time, which helps the plant recover faster.
Step-by-Step: How to Transplant Seedlings Into Larger Pots
Work through these steps on a cloudy morning or in the shade if you can. Strong sun right after a move can stress young plants.
Tomato - Heritage Cottage Orange →
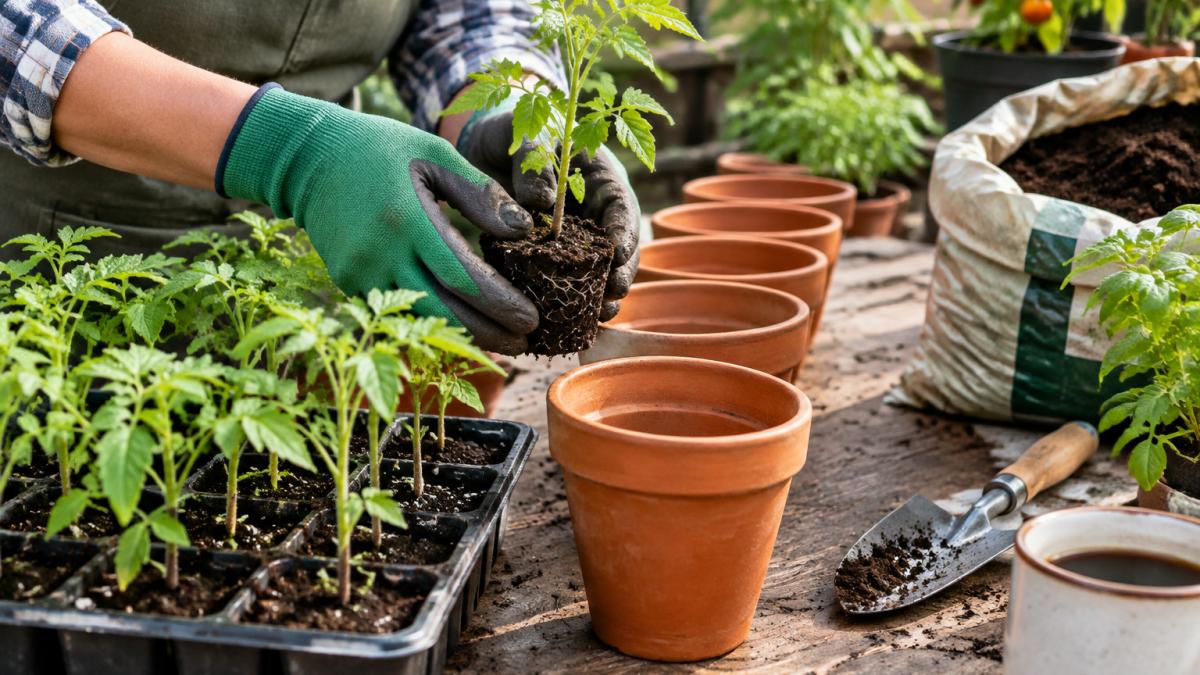
- Water the seedlings in their tray a few hours before you transplant. Damp roots slide out more easily.
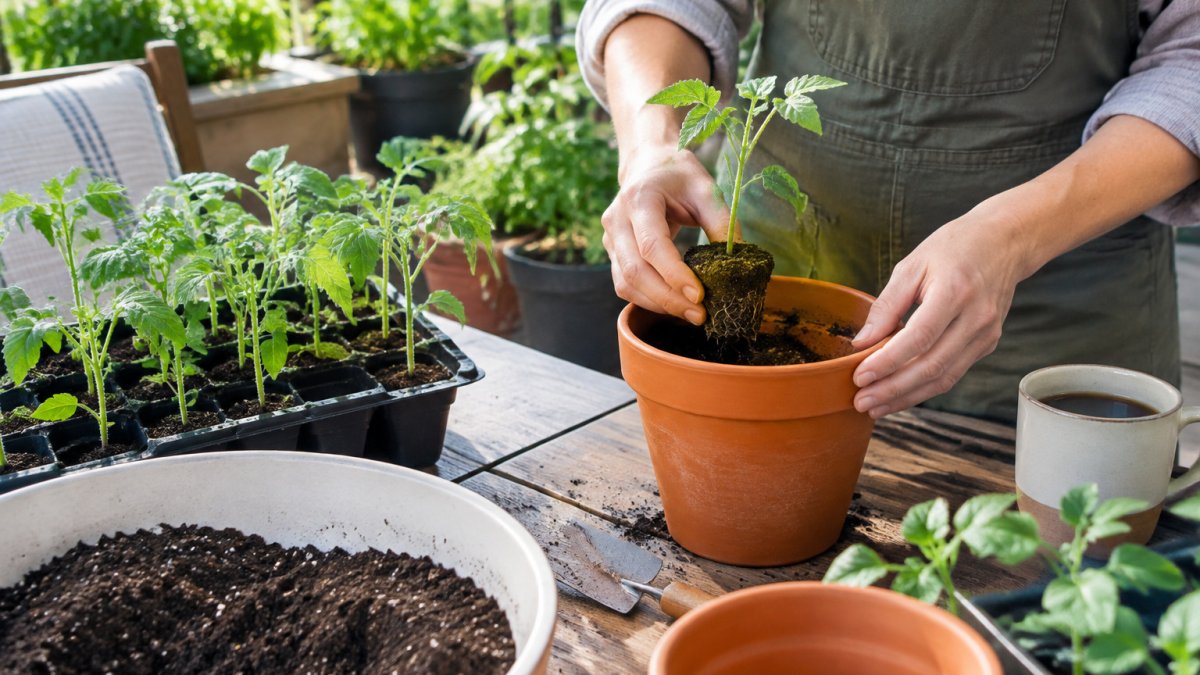
- Fill the new pot with moist potting mix, leaving about an inch of space at the top.
- Make a hole in the mix that is a bit deeper and wider than the root ball.
- Loosen the seedling by pushing a butter knife into the soil around its cell.
- Gently lift the seedling by its leaves, never by the stem.
- Set the plant in the hole at the same depth it was growing before.
- Firm the mix lightly around the roots so the plant stands upright.
- Water thoroughly until water runs out of the drainage holes.
Watering, loosening and lifting each seedling
Water is your best friend during this step. A thorough soak settles the mix around the roots and removes air pockets. Then loosen the root ball gently with your knife, pushing down the sides of the cell.
Lift from the leaves, not the stem. A stem can bruise or snap easily, but a leaf can be replaced. Keep a light grip and let the plant come out in one piece.
Separating crowded or tangled roots
Sometimes a seedling's roots form a tight knot. Gently tease the outer roots apart with your fingers, working slowly from the bottom up. If the roots are badly tangled, trim away a few of the longest ones with clean scissors. A small trim encourages new roots to grow, while a tangled mess stays stuck.
How to Prevent Transplant Shock in Seedlings
Transplant shock is the wilting, yellowing or stalled growth that can follow a move. It happens because roots are disturbed. A few simple habits keep it mild.
- Keep the root ball intact whenever possible
- Water the plant well right after moving it
- Shade the seedling from strong afternoon sun for a few days
Most seedlings bounce back within a few days. If yours is still drooping after a week, check that the pot is not waterlogged.
Troubleshooting and Aftercare: Your Next Steps With Container Seedlings
After the move, give your plants a steady routine. Place them where they get the right amount of light for their type, usually full sun for tomatoes and peppers once they harden off. Check the soil with your finger each day. Water when the top inch feels dry.
Light, temperature, and humidity after potting up
Newly moved seedlings are not ready for full, all-day sun right away. To protect newly moved plants, see how to protect vegetable seedlings from sunscald.
Temperature matters too. Most vegetable seedlings grow best when daytime temperatures are in the 70s and nights stay above about 50°F. If a late cold snap is coming, bring containers indoors or into a garage overnight.
When to resume fertilizing
Wait about a week to ten days after potting up before you fertilize. The fresh potting mix usually carries enough nutrients for that stretch, and feeding too soon can burn tender new roots. After that, a balanced liquid fertilizer at half strength every two weeks is a gentle way to keep container plants growing, since they cannot reach beyond the pot for food. Once plants are established and flowering, you can shift to a formulation higher in phosphorus and potassium to support fruit set.
Symptom-and-remedy guide for transplant shock
Even with careful handling, some seedlings sulk for a few days. Here is how to read the signs:
- Wilting right after the move: Usually normal for a day or two. Keep the mix evenly moist and keep the plant out of harsh sun. If wilting persists past three days, check that the pot drains freely and that you did not bury the stem too deep.
- Yellowing lower leaves: Often a sign of overwatering or poor drainage. Let the top inch of mix dry out between waterings and confirm the drainage holes are not clogged. If only the oldest leaves yellow and the new growth is green, the plant is likely just shedding seed leaves.
- Stalled growth: The plant may still be too small for its pot, or the mix may have run out of nutrients. Check for roots circling the inside of the pot; if you see them, it is time for another size up. Otherwise, resume gentle fertilizing.
Most seedlings bounce back within a few days. If yours is still drooping after a week, check that the pot is not waterlogged and that the roots were not badly torn during the move.
Keeping notes for next season
Keep notes on what you planted, when you potted up, and how each variety responded. Over a season or two, you will learn which of your container vegetables want an earlier move, which prefer to stay in a smaller pot longer, and how our Southeast heat and humidity shape watering. That record is worth more than any general chart, because it is tuned to your own back fence.
Frequently Asked Questions
How do I safely repot seedlings into bigger pots?
Water the seedlings a few hours before you start so the root ball holds together. Fill the new container partway with moistened potting mix, lift each seedling by its leaves rather than its stem, and set it so the top of the root ball sits just below the rim. Firm the mix gently around the roots, then water thoroughly. Keep the new pot out of harsh direct sun for the first few days while the seedling settles in.
When should you move seedlings into bigger pots?
Move seedlings once they have developed their first true leaves and their roots begin to fill the cell or starter tray. Roots that circle the edges of the cell or push out of the drainage holes are a clear sign. Waiting too long can stunt growth and make separation harder, so check your seedlings every few days once they are actively growing.
What size pot should I use when potting up seedlings?
Choose a container only one size larger than the current cell, often about 3 to 4 inches across for young vegetable seedlings, and make sure it has drainage holes. Oversized pots hold excess wet soil that can rot young roots. Larger plants, such as peppers or tomatoes that will grow for a long season, can later move into bigger containers as their roots fill the space. Planting in pots that are too big is a common beginner mistake.
How long does it take for seedlings to recover from transplant shock?
Most seedlings show some wilting or pausing for about a few days to a week after transplanting. Keeping soil evenly moist, providing shade during the hottest part of the day, and avoiding fertilizer until new growth appears usually speeds recovery. If leaves stay limp or yellow after a week or two, check watering and drainage.
Have a question about your container seedlings? Stop by the Heritage Cottage Seeds shop and we'll help you get started.