 how-to
How to Fix Tomato Seeds That Won't Sprout
Last Updated: November 4, 2026
Quick Summary
Tomato seeds that won't sprout usually have cold soil, are planted too deep, or are old and weak. Keep the seed-starting mix around 75 to 85 degrees Fahrenheit, plant about one-quarter inch deep, and run a paper towel test to check viability. If nothing appears within 14 days under warm conditions, your tomato seeds sprout poorly and you should start over with fresh seed.
- Keep seed-starting mix around 75 to 85 degrees Fahrenheit for best germination.
- Plant tomato seeds about one-quarter inch deep, not deeper.
- Test seed viability with 10 seeds on a damp paper towel for 5 to 10 days.
- If at least 6 of 10 seeds sprout, your seed lot is in good shape.
- Allow up to 14 days under warm conditions before deciding to start over.
Table of Contents
- Why Your Tomato Seeds Aren't Sprouting Yet
- Check Your Soil Temperature First
- Step 1: Test Whether Your Seeds Are Still Viable
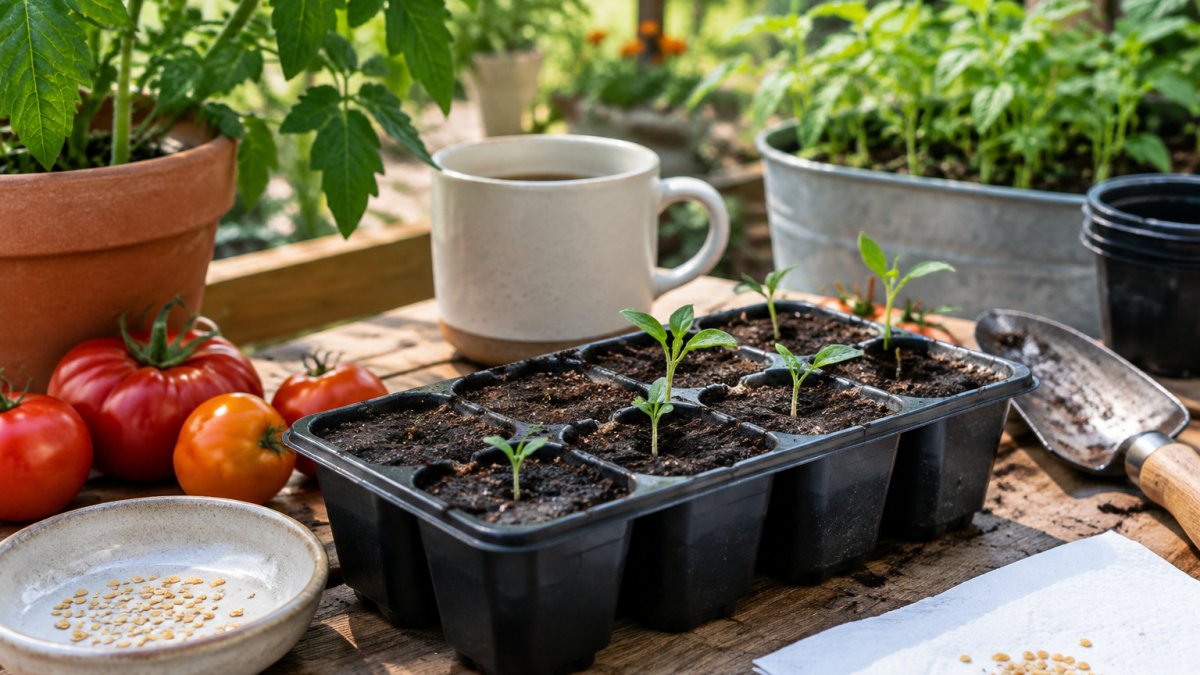
- Step 2: Fix Planting Depth, Moisture, and Light
- Stopping Seed Rot and Damping Off in Containers
- How Long Tomato Seeds Take to Sprout Indoors
- Deciding Whether to Start Over or Wait
- Pick a Reliable Replacement Seed for Your Next Try
- Frequently Asked Questions
If your tomato seeds have sat in that tray for two weeks with nothing to show for it, you are not alone. Most stalled seeds come down to a few fixable problems: soil that is too cold, planting too deep, moisture that swings between soggy and bone dry, or old seed. Work through the steps below in order, and you will likely find your culprit before the week is out.
Why Your Tomato Seeds Aren't Sprouting Yet
Tomato seeds are patient, but picky. A seed needs warmth, steady moisture, air, and a reason to wake up. When one is missing, the seed waits, sometimes a few extra days, other times until it rots.
Starting tomato seeds indoors in containers gives you tighter control over temperature and moisture than an outdoor bed does. That control is your best friend here. Let's go through what to check.
Check Your Soil Temperature First
Cold soil is the most common reason tomato seeds sit and do nothing. Tomatoes are warm-season plants, and their seeds need a warm start. But "warm" is not a feeling, it is a number you can measure, and the number that matters is the temperature of the seed-starting mix itself, not the air in your kitchen.
Quick answer: Tomato seeds germinate best when the soil stays around 75 to 85 degrees Fahrenheit. Below about 60 degrees, germination slows down a lot, and seeds can rot before they ever sprout.
Why cold soil causes rot, not just delay
A tomato seed absorbs water and its embryo wakes up only when the mix is warm enough. In cold, wet mix, the seed still takes on water, but the embryo's metabolism stays too slow to push out a root. Meanwhile, the damp, cool conditions are exactly what soil-borne fungi like. The seed sits there swelling, then softening, then rotting, and you never see a sprout.
Measure the mix, not the room
- Push a soil thermometer or a simple kitchen thermometer two inches into the seed-starting mix, right where the seeds are.
- Take the reading in the morning, because that is when container mix is coldest.
- Check a few containers, not just one, the tray on the outside edge of a heat mat or near a window runs cooler than the middle.
Fixing cold soil in containers
- Place your seed trays on a heat mat set for seedlings if you have one. A heat mat is one of the best small investments a container gardener can make, because it warms the mix from below where the seed actually sits.
- Keep containers out of drafty windows, cold garages, and spots near air conditioning vents. A windowsill that feels warm at noon can drop twenty degrees overnight.
- Cover trays with a clear dome or plastic wrap to hold in warmth and moisture until seedlings appear. Remove the cover once you see green.
Micro-climate troubleshooting: apartment vs. greenhouse vs. back porch
The same seed packet behaves differently depending on where your containers live, so match your fix to your setup.
- Apartment or indoor grower: Your rooms are comfortable for you, which usually means 68 to 72 degrees, too cool for tomato seed. A heat mat is close to essential here. Indoor air is also dry, so a dome helps hold humidity, but take it off the moment you see green or you will trade cold soil for damping off.
- Greenhouse or sunroom grower: Daytime heat can climb past 90 degrees even when nights are cool, so the mix swings. Measure at both ends of the day, vent during the afternoon, and rely on the heat mat or a warm bench at night.
- Back porch or garage grower: These spaces track outdoor temperatures and are the most variable. Keep trays off concrete floors, which stay cold, and off metal shelving that conducts heat away. A piece of foam insulation under the tray makes a real difference.
The airflow trade-off
Warmth and airflow pull against each other. A dome holds heat and moisture but also traps still, humid air, the setup damping off loves. The pattern that works: dome on until the first sprout, then dome off and a small fan on low, set a few feet away, to keep air moving without chilling the mix.
Watch out: a heat mat left on full after seedlings emerge can cook young roots. Turn it down or off once most seeds have sprouted, and let room temperature carry them from there.
Step 1: Test Whether Your Seeds Are Still Viable
Before you blame your technique, check the seed itself. Old seed loses vigor, and some will never sprout no matter how well you care for it.
A simple paper towel test:
- Count out 10 seeds.
- Dampen a paper towel, then lay the seeds on it, spaced apart.
- Fold the towel over the seeds and slide it into a zip-top bag.
- Keep the bag somewhere warm, around 75 to 80 degrees.
- Check after 5 to 10 days. Count how many seeds have sprouted.
If at least 6 of the 10 seeds sprout, your seed lot is in good shape. If only 2 or 3 sprout, the seed is weak, and you should plan on sowing more seeds per container or replacing the packet.
Note on storage: Seed viability drops faster when seed is stored in heat, humidity, or light. Keep seed packets sealed in a cool, dry, dark spot.
Step 2: Fix Planting Depth, Moisture, and Light
These three things are where many gardeners go wrong without realizing it.
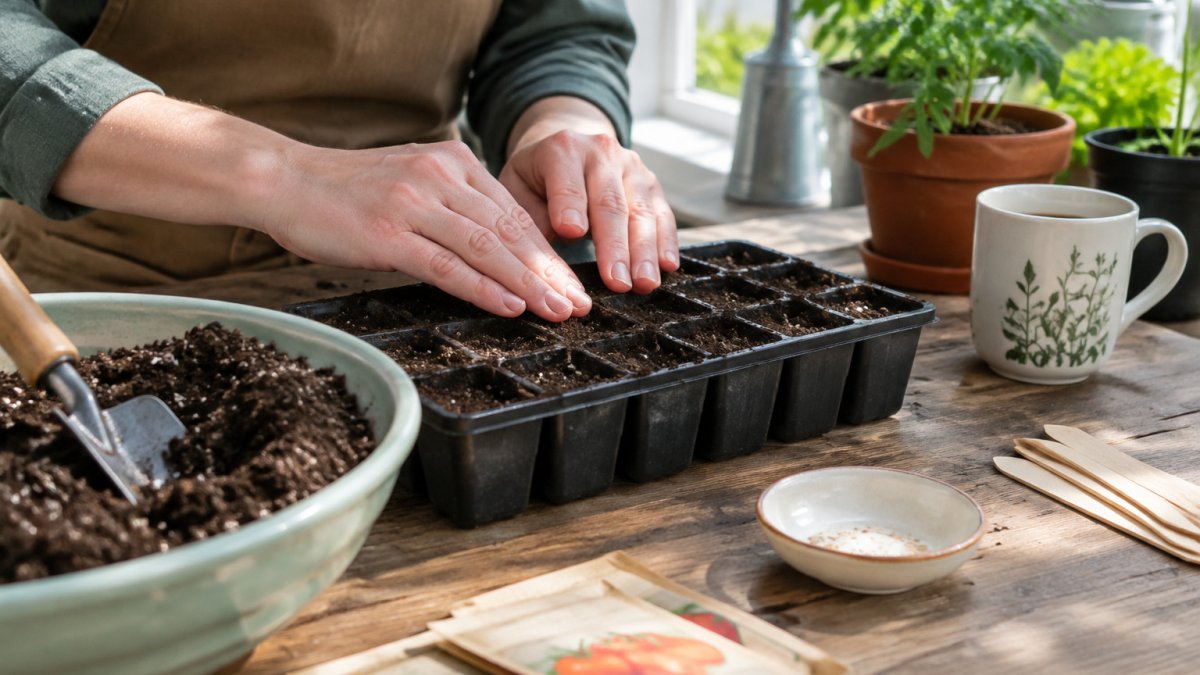
Planting depth:
- Sow tomato seeds about one-quarter inch deep.
- Planting deeper delays emergence and uses up energy the seedling needs to break through.
- Sowing too shallow lets seeds dry out on the surface.
Moisture:
- Keep the seed-starting mix evenly damp, like a wrung-out sponge.
- Mist the surface gently rather than pouring water on top, which can wash seeds out of place.
- Use a seed-starting mix rather than garden soil.
Light:
- Seeds do not need light to germinate, but seedlings do need it right away once they emerge.
- Place trays in a bright window or under a grow light set 2 to 4 inches above the seedlings.
- Without enough light, seedlings stretch and turn spindly, a condition called "leggy" growth.
Overwatering vs. Underwatering: How to Tell
Both extremes stop seeds cold, and the symptoms can look alike at first.
Tomato - Heritage Cottage Orange →
- Overwatered: The mix stays soggy, has a sour smell, or has fuzzy white or gray growth on the surface. Seeds may rot in place.
- Underwatered: The surface dries to a pale, crusty layer, and the seed never swells or sprouts.
Press a finger into the top quarter inch of mix. If it feels wet and cold, let it dry slightly and improve airflow.
Here's a quick side-by-side of the three settings that most often trip up seed starters, so you can spot your problem at a glance.
| Factor | Target | Common mistake |
|---|---|---|
| Planting depth | About one-quarter inch | Sowing too deep delays emergence |
| Moisture | Evenly damp, like a wrung-out sponge | Soggy mix or dried-out surface |
| Light after emergence | 2-4 inches under a grow light | Seedlings stretch and turn leggy |
Stopping Seed Rot and Damping Off in Containers
Damping off is a fungal problem that attacks seedlings at or just below the soil line (Damping-off in Vegetables). Seedlings collapse, turn thin and brown at the base, and fall over.
Keeping seedlings in clean containers, using fresh sterile seed-starting mix, and avoiding overcrowding are the habits that help most. For a practical way to keep track of which batches succeed or fail, see organize and label seed packets.
Two different failures, two different fixes
It helps to separate the two problems, because they happen at different stages and call for different responses.
- Seed rot (before sprouting): The seed softens, darkens, and never emerges. You find it by gently digging into a container after 10 to 14 days. This is a moisture-and-temperature problem, cold, soggy mix. Fix the warmth and let the surface dry slightly between mistings.
- Damping off (after sprouting): A seedling that looked fine yesterday is pinched thin and brown at the soil line and has flopped over. This is an airflow-and-humidity problem. Fix the air movement and remove the fallen seedling immediately.
A container sanitation routine that actually works
- Use clean, sterilized containers and fresh seed-starting mix every season. Old mix and reused flats can carry the fungi from last year.
- Sow seeds thinly so seedlings are not crowded. Crowded seedlings shade each other, keep the surface damp, and block airflow, the exact conditions damping off needs.
- Water from below when you can. Set containers in a shallow tray of water and let the mix wick it up, which keeps the surface drier than overhead watering.
Air movement is your strongest defense
Good air movement and a dry surface are your best protection. Indoors, a small fan on low, set a few feet away and aimed to stir the air rather than blast the trays, works well.
Watch out: a dome left on after sprouting is the single most common container mistake. It holds the humid, still air that damping off thrives in. Take it off at the first sign of green.
Reading the surface: a quick visual check
You do not need a lab to catch trouble early. Look at the surface of the mix each morning.
- Healthy: Evenly damp, no fuzz, seedlings standing upright with sturdy stems.
- Too wet: Fuzzy white or gray growth on the surface, a sour smell, or a green algal tint. Let it dry slightly and increase airflow.
- Damping off starting: Stems pinched at the soil line, even if the leaves still look green. Remove affected seedlings and improve air movement at once.
Keep an eye on your containers every day during the first two weeks. A daily two-minute look catches nearly every problem while it is still small.
How Long Tomato Seeds Take to Sprout Indoors
Patience matters here. Under warm, steady conditions, many tomato seeds sprout in about 5 to 10 days. Some take up to 14 days, and older seed can take longer.
If you are past 14 days and see no growth, dig gently into one container and check the seed. Firm, pale seed that has not swelled may be dormant or dead.
Deciding Whether to Start Over or Wait
This is the hard call every gardener faces. Use these guidelines:
- Wait if the soil is still cool, the seed passed the paper towel test, and there are no signs of rot. Give it up to 14 days under warm conditions.
- Start over if the seed fails the viability test, the containers smell sour, or you see damping off.
- Start over if your timing has slipped so far that the plants would not mature before frost in your area.
Starting over is not a setback. It is a chance to fix the problem that stalled the first round. Before you decide, see how to store heirloom seeds in the right containers so your next batch holds its vigor.
Pick a Reliable Replacement Seed for Your Next Try
If your seed failed the test, choose fresh seed from a source you trust and store it well. Several tomato varieties suit container and small-space growing. Two good options to consider:
- Tomato - Everglades: An indeterminate cherry tomato with seed packets holding 20 to 25 seeds. Tomato - Everglades
- Tomato - Heritage Cottage Orange: A compact determinate variety reaching about 3 to 4 feet, suited to containers and raised beds. Packets contain 20 to 25 seeds. Tomato - Heritage Cottage Orange
Whichever variety you choose, store the packet sealed in a cool, dark spot, and run the paper towel test before you sow your next batch.


Frequently Asked Questions
Why are my tomato seeds not sprouting?
The most common reasons are soil that is too cold, planting too deep, seed mix that stays soggy, or seeds that are old or have lost viability. Tomato seeds generally need a warm medium, roughly 75 to 85 degrees Fahrenheit, to germinate well. Start by checking the temperature of your seed tray with a simple soil thermometer, then confirm moisture is even but not waterlogged. If conditions are right and nothing has emerged after two to three weeks, test a few seeds on a damp paper towel to check viability before you replant.
What is the ideal soil temperature for tomato germination?
Most tomato seeds sprout best when the seed starting mix sits between about 75 and 85 degrees Fahrenheit. Below roughly 60 degrees, germination slows dramatically and seeds can rot before they emerge. A heat mat under the seed tray is a practical fix for cool apartments or early spring windowsills. Place a thermometer in the mix rather than relying on room temperature, since air temperature and soil temperature can differ by several degrees.
How can I tell if my tomato seeds are dead?
Seeds that are dead usually feel soft, look shriveled, or show no swelling after soaking. The simplest test is the paper towel method: place ten seeds on a damp paper towel, fold it, seal it in a plastic bag, and keep it warm for about a week. If several seeds sprout, your batch is still viable. If none do, the seeds have likely lost viability and should be replaced. Seeds stored in a cool, dry, dark place keep their viability far longer than seeds stored in a humid garage.
Can old tomato seeds still germinate?
Yes, tomato seeds can still germinate when stored cool and dry, but germination rates drop as seeds age. Older seeds may still sprout, just more slowly or unevenly. Run a viability test first, and if germination looks weak, sow extra seeds per cell to make up for the lower success rate.